Tuesday, April 2, 2013

Is That All?


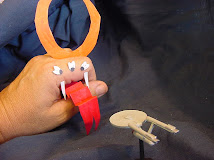
Is that IT?  Is that all I have to show for myself?  I'm afraid so.  One cycad from a Tamiya "Tyrannosaurus Diorama Set" is about all I've managed to do, modeling-wise, in a while.  I'm afraid I've painted myself into the "too many long projects all at the same time" corner.  An AMT 1/25th scale Ford stake truck that seems to absorb as many hours as I can put into it, and STILL be nowhere near completion.  The aforementioned Tyrannosaurus diorama, which keeps running into difficulty because I keep painting the dinosaur in various color schemes other than grey, and I never like them, so I strip the model and reprime it and start over...

I'm not even finished with the cycad, shown above, which consists of about four plastic parts, some paper-wrapped wire, and crinkly green crepe paper that you have to cut out of a sheet.  It all comes in the kit, and the paper leaves actually look pretty good, but it took a week for my eyes to uncross afterwards.  Alas, however, the paper is two-toned, light green on one side and dark green on the other, and guess who glued the leaves to the wire armatures upside-down?  DOH!  Maybe mine is a rare pale-green cycad...

I've been going pretty strong in the areas of buying new kits and looking at the parts and leafing through the instructions, but not so efficient at actually finishing anything.  It didn't help that we had a very cold and wet winter (by Arizona standards) and I've been spending most of my time lately trying to get ahead of the colossal growth of weeds.

But I wrote a stern letter to myself demanding more output, and I'm confident that it'll work.


Saturday, January 19, 2013

Iron Man


Iron Man, by Moebius.  Not quite a figure, and not quite a tank, and not quite a car, but something in between all of them.  In some ways, this is an excellent kit, not too fiddly to assemble, and with good engraved detail in the parts.  In other ways, though, it's a pain.  Most of the major parts (arms, legs, head, torso, etc) have highly visible seams, and it takes a lot of work to get rid of them.  Not much filler putty, but lots of heavy filing to level the parts, and then progressive sanding to get rid of the tool marks.  Some of the seams cross raised detail or occur in places that are hard to reach.

The upshot is that my natural urge would be to paint the model in process and assemble the pre-painted parts at the end.  But the nature of the seams means that you can't do that, not unless you want ugly seams visible.  If I were to build this kit again (and I might) I'd probably assemble, file, and sand the arms and legs separately, but I can't find any way to assemble and sand the chest and torso independently.  Most of my time was spend sanding and polishing the fully-assembled model before painting, and I think that's just a fact of life with this kit.  (I reduced the amount of time I spent on it by not getting too obsessive about the seams on the backs of his legs.  I did some work, but not as much as I did on the fronts.)

The instructions don't offer much insight on painting.  The instructions list good painting tips and techniques, but they aren't so helpful in deciding which part is gold or silver or red.  Fortunately, there are a lot of references, and since it's a comic book thing, I figure a certain artistic license on the part of the modeler is acceptable (such as the silver I applied to the flexible joints in his wrists and elbows - not prototypical, I don't think, but it makes sense to me, and it's MY model, so neener). 

I spray-painted the whole model with Tamiya metallic red lacquer that was left over from a Corvette model.  In retrospect, I wish I had used a somewhat deeper red, but it's still okay.  The silver and gold were brush-painted with old-school Testors enamels.  I basically brush-painted the whole model with a layer of thinned flat black acrylic craft paint, and then rubbed most of it off with an old sock and Q-tips, leaving the black paint in the recesses and along the edges of panels.  I rather like the effect, but then again, I like canned tamales; my tastes need not be taken as necessarily good.

I enjoyed building it, even with all the filing and sanding, and the fact that it's difficult to paint.  I didn't mind the work.  But I suspect a lot of kids are going to buy this model and be confounded by the scale of the task, or put off by the amount of sanding necessary.  It looks like a beginner's kit, but it really isn't.

Dragon LVT


This is the Dragon 1/72nd scale LVT, which I built fairly quickly mostly so I could try Vallejo paints on an armored vehicle.  LVTs were amphibious armored vehicles intended to help the Marines invade islands in the Pacific; this particular one is armed with a 75mm howitzer from an M8 and served with the 2nd Armored Amphibian battalion on Iwo Jima.  The kit offers two marking options, but I liked this one, because of the sand and brown camouflage.

It's a nice kit, and quite detailed for 1/72nd scale, especially in the turret.  The tracks are a kind of glue-able flexible plastic (maybe Vinyl, maybe not).  But they're a little too glue-able; I melted the joining areas right off one of the tracks through overzealous use of cement (you can see the gap in the tracks just over the rear return roller).  The Achilles Heel of many 1/72nd scale armored vehicles is the tracks, but the tracks in this kit are quite nice, with detail on the inside and outside, and the proper "scooped" grousers that propelled the thing through water.  There are two quirks with the model.  One is that the antenna bases are missing.  I'm pretty sure these were provided as parts and I merely lost them.  The second is the presence of two holes in the rear doors.  They look like mounting holes for something, but no parts were provided, and they aren't mentioned in the otherwise excellent instructions.  Maybe they're just peep-holes.  I don't know.

I spray-painted it with olive drab (really, Krylon "Oregano") and then brush-painted the rest of the camouflage with Vallejo acrylics.  It took several coats to get decent coverage, and even now, the coverage isn't great.  When I get around to weathering the vehicle, the blotchy sand and brown won't be evident, but if I wanted this model to show a factory-fresh example, I'd need another coat.  Or have to learn how to airbrush Vallejo paints.

The tracks are painted Oily Steel, and I do quite like that paint.  When you first apply it, it looks too thin, like it'll never cover, but it undergoes some kind of transformation as it dries and what looked like poor coverage at first suddenly turns very good.  I approve.

Vallejo Paints


Behold, my first use of Vallejo acrylic paints.  They're all the rage in the modeling world these days, but for a long time I resisted using them, mostly because I already had so much paint on hand that buying more felt like an needless expense.  The models are 1/144th scale Russian fighters: an Attack MiG-21MF in Egyptian markings, and an Academy Su-22 in what I think are Hungarian markings.  Both were brush-painted with Vallejo acrylics.

So what do I think?  First, the kits:  I like the Attack MiG-21; it's quite refined even in 1/144th scale, though a touch fiddly - the wings and horizontal stabilizers have TINY joining areas, and long-term durability is doubtful.  The Academy Su-22 is much more crude, simplified and chunky and sporting heavy panel lines that bring the old Matchbox kits to mind.  But they're cheap and easy to build, and don't take up much space on the shelf.

The paint:  I've been using craft paints for years, and honestly, Vallejo acrylics strike me as being little more than good quality craft paints.  They're good, and I'll probably keep using them, but if you have any experience with craft paint, you'll find Vallejo paints pretty familiar.  I like the squeeze bottles, and I think they lay down a little thinner than craft paint, but in most other respects, they're about the same.  The main advantages of them is that you don't have to mix colors - if you want US Army khaki, you can get it pre-mixed and you don't have to fiddle around trying to mix it on your own.  So, I regard them as good and worth using, but not quite the life-exchanging experience that the buzz seems to argue for.

(There is, upon reflection, one major advantage of Vallejo paints over craft paints.  I've never found a metallic craft paint that was worth anything, but the Vallejo "oily steel" metallic paint is very, very good.  Even if I decide not to keep buying Vallejo paints, that's one that I WILL keep using.)

Saturday, September 29, 2012

AMT Boss Nova


AMT's Boss Nova drag car kit.  I've always liked this kit and I've been meaning to build it for a long time.  I stripped the chrome parts with oven cleaner a few years ago, but other than that it's been sitting in its box for ages.

It's a mixed bag, really.  Most of the chassis is simplified to the point of being toylike, and the tires really deserve to be replaced.  But the engine has nice detail, and I really liked the "Chrysler Firepower" engraving on the hemi's valve covers.  It also comes with a variety of induction schemes, including a blower and crossed fuel injection, but I selected the eight-carburetor setup because I like that "forest of carburetors" effect (and the carbs aren't bad - all I did was drill out their throats).

I wired the distributor, but routing spark plug wires in a realistic manner isn't my strong suit.  I added a few other details - some entirely bogus fuel tank plumbing, a coil, and a tank of some sort I found and glued to the back of the firewall.  It could have used better seat belts and cans/wiring on the back of the instrument panel, at least, but I didn't get that far.  Most of the decals are what came with the kit, the only exception being the Goodyear tire markings that I got from a Slixx sheet.  I also drilled out the headers, but otherwise they're as they were supplied by the kit.

The paint is mostly Testors two-part lacquer spray paint, with various metallic paints on the engine (burn iron metalizer on the headers and Humbrol bronze on the carburetors), brass metalizer on the wheels, and Bare-Metal Foil for the window trim and rocker panels.  I tried to save the chrome plating on the grill and bumper parts, but I ended up having to strip, sand and repaint the grill insert.

The best part of the kit is the Chrysler hemi engine; the rest is downhill from there.  But it was still fun.


Mirage T26S


This is the Mirage 1/72nd scale Russian T26S tank - probably a medium tank in its day, but more like a light tank by the outbreak of World War Two.  It's quite a kit, comprising just about a million parts and incorporating a lot of detail for such a small model (64 parts in the running gear alone).  

It isn't fun to build.  The plastic is very soft and easily damaged with solvent cement, and the profusion of small parts makes patience not just a virtue but an actual necessity.  I needed extra light, reading glasses, and better tweezers to finish this kit.  And there are fit problems - in particular, a gap where the upper glacis meets the front of the hull, and another wide gap between the halves of the driver's hatch.  But these fit problems may have been self-inflicted; there aren't a lot of positive location pins or tabs and it's entirely possible I misaligned something while I was building it.  The tracks are also hard to work with.  I'm used to vinyl tracks, and actually prefer them over link-and-length styrene tracks, but these seemed especially slippery and disinclined to hold paint.

But while it isn't exactly fun to build, it's pretty satisfying to build.  There's nothing simplified about it and when one finishes it, one has a sense of actually having struggled and overcome.

I was going to paint it green and then give it a winter whitewash, but I liked the green (I used Model Master "Soviet Armor Green") so I killed the gloss with Dullcote and brushed on some ground-up pastels and called it good.  The kit contained no decals and I chose not to try to paint any patriotic Cyrillic slogans, mostly because my eyes still hurt from assembling the suspension.  (I really wanted to paint it as though it were a Republican T26 in the Spanish Civil War, but I don't think they used any T26Ss.)

Viewing my unbuilt kits, it seems that I must have had a thing for Vickers Six-Tonners at some point.  I have four Mirage Six-Tonners, a 7TP (a Polish derivative of the Six-Tonner) and this T26S (a Russian derivative of the Six-Tonner).  

The brief summary:  tricky and kind of difficult to build, but I'm glad I built it.

Those Horse Guys


I've always liked painting 25mm figures.  Back when I played Dungeons & Dragons, back in the late 1970s and 1980s, 25mm figures were not especially common - at least in my neck of the woods - and I hadn't really discovered tabletop wargaming (I was still playing Tobruk and PanzerBlitz with cardboard counters, and liked it that way).  But since, I've found that I like itty-bitty 25mm figures, even though I don't really play D&D any more and haven't done any tabletop wargaming since I got out of the hospital.

(Explanation:  While I was in the hospital waiting for my transplanted bone marrow to start making blood cells again, I made some trireme and bireme ships out of pieces of paper, and drew rulers and dice on other pieces of paper and amused myself for several days refighting the battle of Actium.)

Anyway - I have no idea where these figures came from.  I just painted them, glued them to a piece of wood, and made landscape with model railroad stuff.  I don't even cut off the bases; I just build up the ground with putty or drywall compound until the bases are hidden.  All I really know about them is that they're 25mm figures, and they were fun to paint.